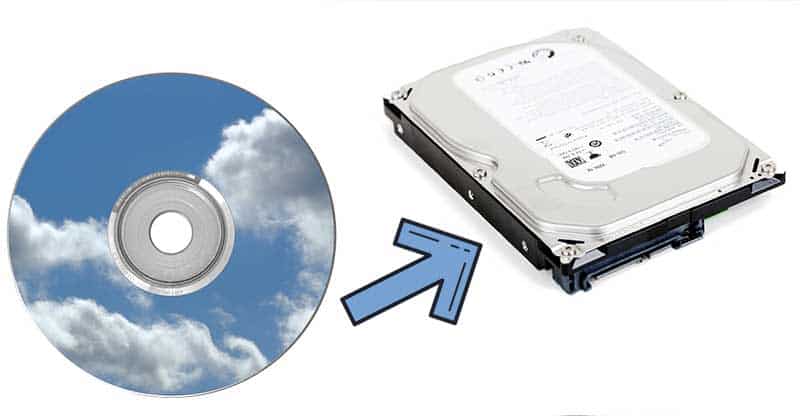
How to Copy DVD to External Hard Disk?: We miss our DVD era! We certainly have a vast collection of DVDs from our early ages and converting them to the hard disk for streaming is an excellent idea.
Back in the pre-Netflix days, DVD’s were the only way of entertainment. Binge-watching our favorite seasons, movies, documentaries were our favorite time pass with DVDs we selected and bought had another kind of charm.
Inspiring your journey, one story at a time. #LifeFalcon.
The idea of converting our favorite DVD’s into hard disk is like bringing the beloved memories of our childhood.
The other factor that makes this whole experience a lot more enticing is that the previous DVD’s we have for our favorite shows are not available online anymore.
Like the VCR, cassettes are like that they were never into existence, soon this shall happen to the DVD CDs.
If you are even a DVD shop owner, your sales might have dropped too. So, converting the DVDs to the Hard disk is the ultimate way to bring those “Retired” DVDs to use.
Well, along with these experiences it is the easiest way for safekeeping the videos you have as they will be prevented from any kind of damage scratches and other corruption and will be copied to the Hard disk safely and soundly, allowing you to watch whenever you want.
The article also highlights the concern of the people as they are quite tired of handling the DVDs that have been lurking around their households from a long time and do not have space to accommodate while as well as do not want to lose them.
Table of Content
Ripping your DVD
Som first things first, how to choose the ripping software. Well, if you want to consider the cost of this process, then you must be aware of the software you need to buy. Typically, a DVD ripping software can cost up to $50, and this is expensive.
Well, this kind of fancy software would come into your use but if you are looking for something extraordinary, but for the regular use in your home you might need to consider the free software.
There are many options for an open ripping software, but the preferred one would be Handbrake which is also free to download and easy to use.
The issues you might face with protected DVDs
You might be well-aware of the fact that the DVDs that we buy from the stores do have some sort of layered protection on them in order to save these DVDs from piracy.
Though this does not really work and the piracy industry still thrives and does have a crash, but even this is the factor that you still might need to deal with while ripping your DVD.
The science behind is that it is a legal grey area under the US law until they are in accordance with fair use.
So, this explains that the ordinary ripping software cannot function the protected DVDs, you will need to handle it well yourself.
How to rip your DVD before conversion?
Before starting the conversion process, it is required that you rip your DVD. For this, you can use specific software (as mentioned above), but the Handbrake is the best one, so the further given details and procedure refers to Handbrake software to rip your DVDs.
You can start with inserting your DVD CD into the CD ROM of your computer. Once done, launch Handbrake it may take some while to launch and completely open
Once, when the app is entirely free, you will see the panel of Source Selection On the left side of the screen or the app. You must select an option to proceed further in the app.
After you are done with the selection, you can overlook File and Folder and straight up go to the DVD icon and select by double-clicking.
Handbrake would take a while to scan the content you have put in. There may be an error message which will indicate that you failed to install libdvdcss.dll otherwise you will reach to the settings correctly.
The second step would is to make the required settings in the Source setting as Handbrake software allows you to rip off any type of content on your DVD.
In most cases, the DVDs have many contents which are other than a TV show or a movie which may include interviews, deleted scenes, director’s cut in short unwanted content.
Now if you think, rationally you will get to know that the most extended material on the DVD will be the movie.
In case you are working on a TV show then your work will be extensive as you will have to save every episode of the show individually.
Next, you will just be required to adjust the chapters and angles which you want to keep in the drop-down box.
In the event that you chose to change the sections to frames or seconds, then this would require a whole other measurement for this.
After this, make a decision that either you want your video to be saved in your video library or the Hard drive of your computer as this gives you an option to save it wherever you want.
A suggestion that if you are using Plex or Kodi, then it is justified to keep it in your existing library.
For the choosing process, click on Browse to get done with the selection.
Here comes the most exciting part, which is to set the quality.
Setting the condition is deciding your experience of the Movie or TV show. Quality selection can be made from the right-hand side of your screen where there are options given for the presets.
You can choose your ripped video in any format you like, for instance, you can choose it in the form of 1080 in Roku to watch on Chromecast.
However, you can scroll down for further options, but you must keep in mind the higher the quality, the more time it will take to rip as well as a larger file.
Lastly, you can choose your Audio and Subtitles for the video you have ripped.
Audio and subtitles will be done by the bottom tab, which will include the options for those.
Filters, video, and pictures will be finalized by the settings you previously choose other than that about audio and subtitles, spending some of your time on this section might be worthwhile.
Audio selection is imperative because this is an excellent way to shorter or decreases the size of your ripped video.
Now, you are done with the process of ripping, and your DVD is ready to be converted into the Hard disk.
Things you need to prepare for the copying of DVDs:
The things that you require for the conversion and the storing on the hard drive are listed and explained below.
These will be helpful to you, so make sure you have made these arrangements before you start up with the process as it would save you a lot of hassle and inconveniences.
Firsthand you will need a DVD Ripping tool, and this has variations.
If your DVD is unprotected, then it will be ripped quite easily with Handbrake, but in case you have a commercial DVD then it will require professional expertise and special ripping tools to take off the protection.
Other than this the DVD rip file are MKV files for which you can also use MakeMKV. But the preferred software is Pavtube ByteCopy for its decrypting power for DVDs and Blu-ray devices.
The difference between MakeMKV and Pavetube ByteCopy is that MakeMKv only supports v60 and not more than that while Pavetube ByteCopy can support several such as BD+, AACs and V60 too for decrypting.
Other functions of the ByteCopy are that it can backup primary title copy of DVD while 1:1 backup DVD movies with lossless SD/HD MKV, MP4/AVI/MOV, MKV, MP4, WMV, 3GP, AVI, H.265 MKV/MP4, 3D SBS MKV/MP4, 4K MP4 and much more.
Secondly, you will require a DVD, and well this is a second step, so it depends on what type of software you will choose.
For instance, if you opt for Handbrake then it should be on the condition that your DVD is unprotected.
But if you are using Pavtube ByteCopy then keep you may also copy the latest seasons, movies, documentaries such as The Stranger Things, Suits, Game of Thrones, Dynasty, The Marvel Studio movies, and much more stuff.
Other then this if you are a MacBook user it is preferred that you use PavtuThe be ByteCopy for Mac.
Below given are some suggestions for Hard disks:
For the best external hard disk drives that are portable.
- Seagate Wireless Plus 2TB
- Maxtor M3 4TB Hard Disk Drive
- iStorage DiskAshur 2TB
- WD My Passport 2TB
For the best external hard disk drives, you may go for:
- WD My Book 8TB
- Maxtor 3D station
- Seagate Innov8 8TB
- Seagate 5TB Expansion
- WD My Book Duo 16TB
- Seagate STEB4000200 4TB EXPANSION
You may choose any of these hard disk drives before starting up the copying procedure for DVDs.
There may also be other excellent hard disk drives which would make your experience much cooler when streaming on TV or any other device.
The procedure of copying the DVD to the Hard Disk
Now, get ready with your favorite DVD as it is time that you bring them in use after a long time.
Then insert your DVD CD in an Internal or external drive.
There are also specific options that you might want to know or keep them into consideration such as you can add several DVDs at a time in your drive as it can perform the whole batch converting function quite efficiently.
More on, you will also be given the option of the subtitle of your own choice, along with a title track that you opt for and an opportunity for forced subtitle is also given In the chapter list below.
After getting done with the previous step, now you need to choose a suitable way to copy your DVD to the Hard drive whichever you opt.
Below given are three options for the deed:
- Copy the entire DVD to the external Hard drive
In this option, you can keep it all! You have the opportunity to choose to keep all the information, including chapter markers, main title, review, advertisement including the whole audio or subtitle streams.
For this just click on the top of the menu on the icon of a monitor screen with a red circle and arrow.
- Copy the DVD to the external Hard drive directly from your computer
This option includes only the main title of the DVD CD that you have inserted to preserved in this particular way.
The benefit of this is that it will save a large amount of space on your hard disk.
The process is that first click on the Format then it will show the option of copy, click on it. After that, select Directly copy.
- Convert your DVD to MKV, MP4 or MOV to External Hard drive
Converting DVD to the options like MKV, MOV, MP4 or AVI gives you several significant advantages such as a full playback on devices like Xbox One, Laptop, Tablet, TV of Samsung, or LG, and many other to your external hard drive.
To copy the DVD, first, click on Format and then choose a suitable format or which one you require which will be the profiles of typical Video or HD video.
Other than that, you can also opt for an optimized preset of the mainstreaming of multimedia players like HD Media player, PS3 or PS4, TV, and other players.
In case your device also supports MKV format you can also opt for the Format in lossless MKV.
Along with these options, you can also set the adjust the video or audio’s parameter by selecting on Settings.
At last, if you choose the previous two ways then click on the Convert which will be given in prominent red color to convert your DVD in your hard disk.
